Creating Your Own Releases
As mentioned in the setup, we are not allowed to re-distribute the compiled dependencies needed for our tools. However, you can compile them and create new releases yourself with a simple GitHub workflow. Lets go through an example!
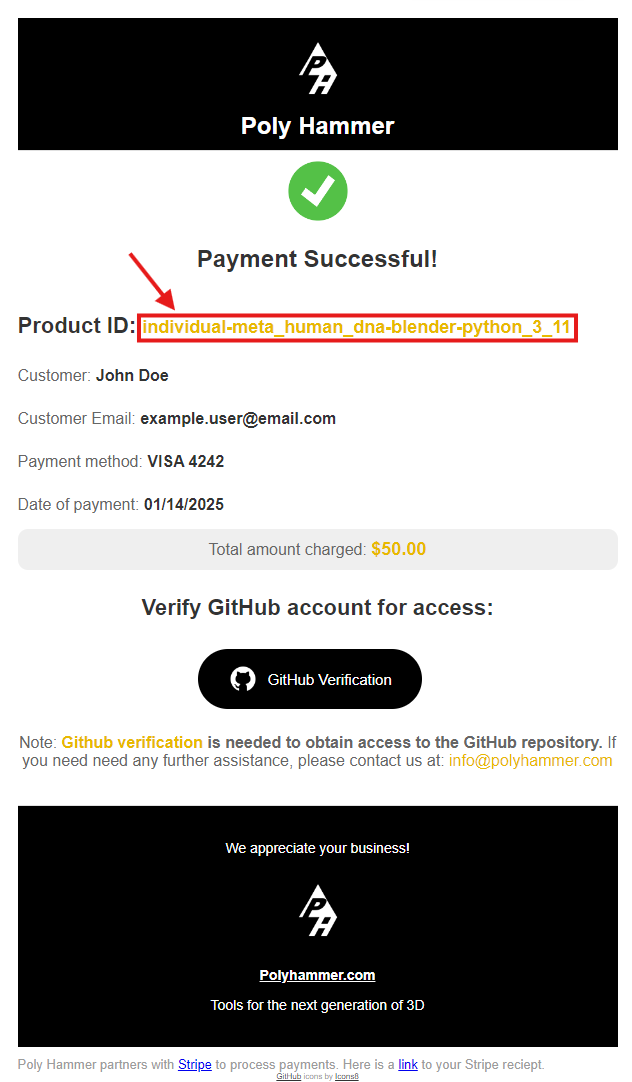
Obtain a Product ID
After completing your purchase, you'll recieve an email like the one below. Take note of your Product ID as you will need this in the next step.
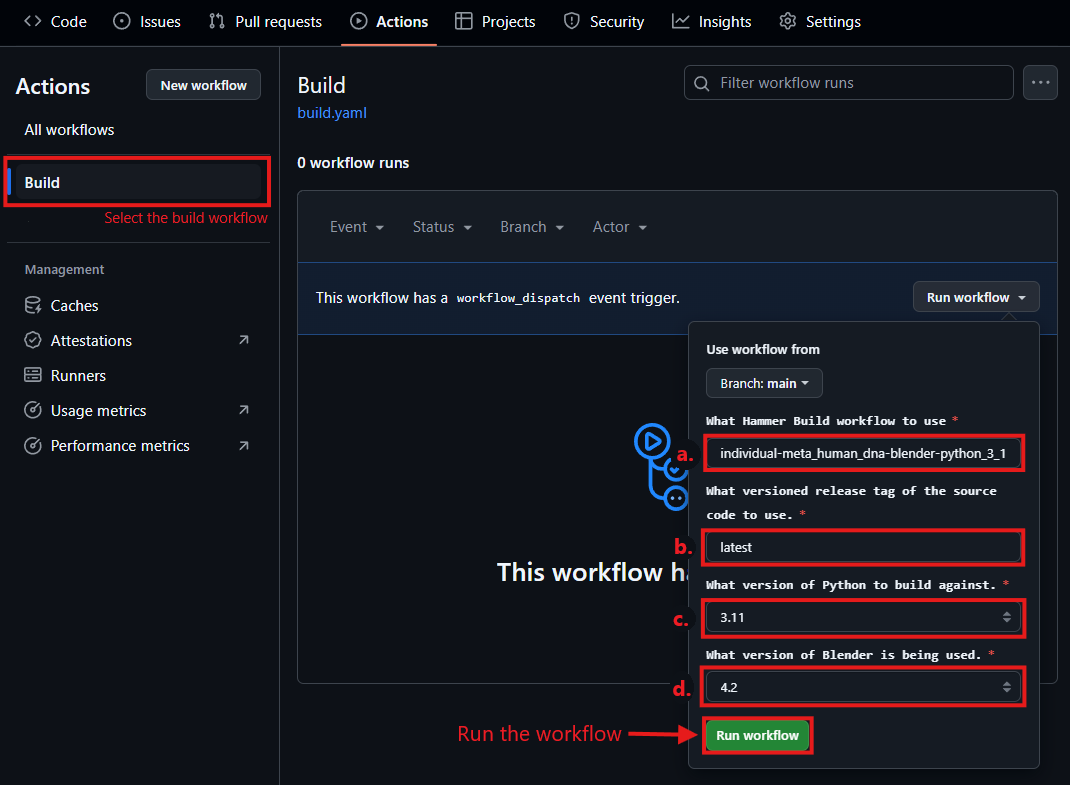
Run the Build Tool
Now navigate to your repo that you made in the setup. Go to the Actions tab and select the Build workflow and Click on the Run workflow dropdown. Enter in your Product ID.
Note
There are 4 inputs to the build tool workflow:
a. Workflow (Product ID): This must match the one in your confirmation email.
b. Version tag: Using latest is typically fine, however you can specify a specific release tag if needed.
c. Python Version: This version of python must be compatible with your version of Blender.
d. Blender Version: The version of Blender you intend to use the addon in.
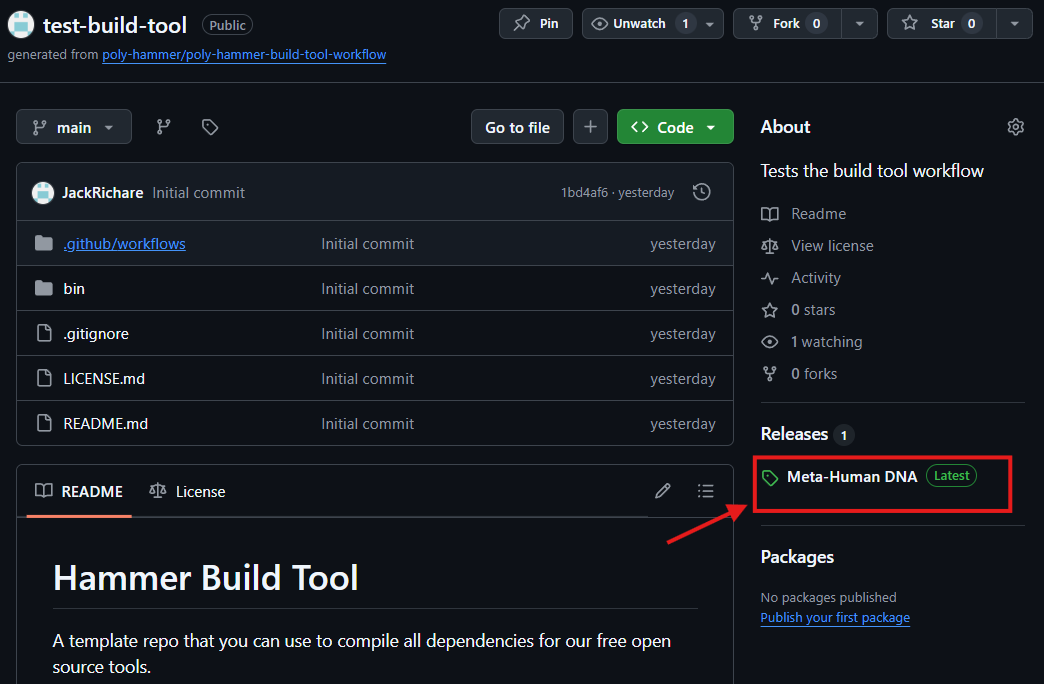
Wait for the Build to Complete
After starting the workflow, you will need to wait for the build to complete. This can take some time (~15min or more). Once it finishes running, you will see a release on your repository's page.
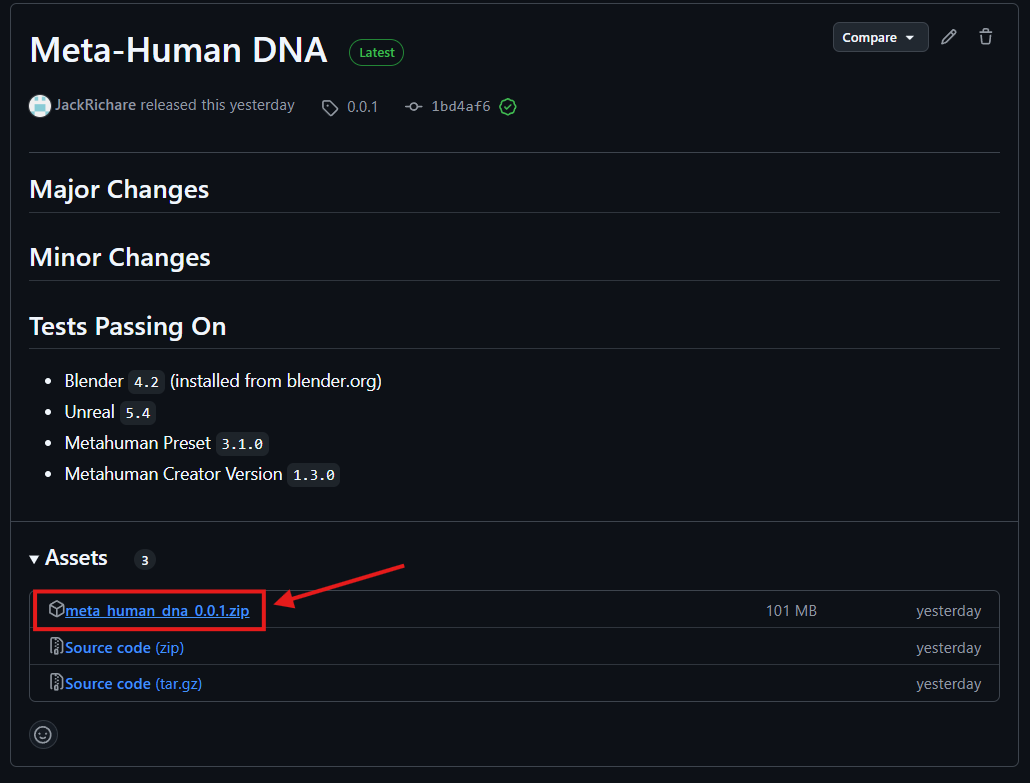
Download the Release
Click on this release and download the release attachments. In this example, we can download the addon meta_human_dna.zip file here.
Success! 🎉
Good work! You have now successfully built and downloaded the release for your product using the Hammer Build Tool!